Python
-
Available fonts. Show all available font families in Python:
 import matplotlib.font_manager
 from IPython.core.display import HTML

 def make_html(fontname):
     return "<p>{font}: <span style='font-family:{font}; font-size: 24px;'>{font}</p>".format(font=fontname)
 code = "\n".join([make_html(font) for font in sorted(set([f.name for f in matplotlib.font_manager.fontManager.ttflist]))])
 HTML("<div style='column-count: 2;'>{}</div>".format(code))
To see just the names of available font families:
sorted([f.name for f in matplotlib.font_manager.fontManager.ttflist]) -
Get immediate subfolders.
import os folder = '~' sfL = next(os.walk(folder))[1] - Interpolated bitmap. Bitmap image can be converted to SMOOTH vector image easily using Python. The original image shown below can be smoothed by the following command:
 import matplotlib.pyplot as plt
 plt.imshow(data, interpolation='spline16')
Then we need to save the smoothed image (vector) in a vector image format (.pdf, .eps, .svg), using the following command:
plt.savefig(r'I:\Github\Python\ForFun\Peng\OP\OP_pdf.pdf', format='pdf')This is the image where I compare original, pdf and svg savefig outcome: compare
-
Matplotlib colormap.
matplotlibhas a convenient way of creating discrete colormap for curves. more infofrom matplotlib import cm viridis = cm.get_cmap('viridis', 8)Then the colors in the colormap
viridiscan be accessed byviridis(x), wherextakes value between 0 and 1. For example,viridis(0.5)is(0.122312, 0.633153, 0.530398, 1.0)in RGBA. All colors can bee seen by callingviridis:
There is no need to import
cmagain, since it’s already included inmatplotlib.pyplot, which I almost import every time. An example:import matplotlib.pyplot as plt set3 = plt.cm.get_cmap("Set3")The “Set3” colormap is created where colors can be accessed by
set3().
-
Convert date object to formatted string: (reference)
Timestamp('2022-01-17 00:00:00') -> '01172022'use
date.strftime("%m%d%Y") -
To “stuff” a
pandas.DataFramewithnp.nan. When calculating MSD from particle trajectories, we want to haveframecolumn to be continuous integer array. However, sometimes in the data, we haveframe = [0, 50, 100, ...]. To fill all the frames without position data withnp.nan, we can setframeas the index of the DataFrame, then reindex the DataFrame with continuous integersnp.arange(...). This creates a trajectory data with continuous frames:pos = traj.set_index('frame')[pos_columns] pos = pos.reindex(np.arange(pos.index[0], 1 + pos.index[-1]))NOTE: I found this method in the
trackpyfunction_msd_gaps(). This has led to a problem when I try toplt.plotthe MSD data, because there are manynp.nanin the data, andplt.plotcannot show a continuous line. To make the plot out of the MSD data stuffed withnp.nan, we need todropna()first. -
Good font. A good serif font for plot labels:
stix. To apply to allmatplotlibtext:import matplotlib matplotlib.rcParams["font.family"] = "STIXGeneral" matplotlib.rcParams['mathtext.fontset'] = 'stix'Note that both the regular text and the math text need to be configured.
-
Download test images from cloud. In image processing code demos, it is neater to download test images when needed, compared to saving the test images in the same code repo. This can be done using the
requestsmodule. The following code snippet downloads my Google user profile picture to a python variable, ready for test image processing tools.import requests from io import BytesIO from skimage.io import imread url = r"https://lh3.googleusercontent.com/ogw/AF2bZyjdOibobKWEbcNNmziQ6CB2ilMepItpdY6Ila0R6d09Bjc=s32-c-mo" response = requests.get(url, stream=True) img = imread(BytesIO(response.content))Google Drive is a good place to save test images. However, when I tried to use the share link as the
urlfor accessing the images in Python, it did not work. It turned out that the direct link to the actual images is a little different from the share link. Fortunately, we can convert a share link to a direct link easily. Here is how:A share link looks like this:
https://drive.google.com/file/d/1LFRt5ozQjJ_WVrWBoPQOFVNl5ZWb8ytP/view?usp=drive_linkthe part after
d/and before/viewis the file identifier. To construct a direct link, we can put this file identifier to the following format:https://drive.google.com/uc?export=download&id=[file identifier] - Manage PyPI project.
- For a step-by-step instruction to create a package from scratch, refer to the Packaging Python Projects tutorial.
- Token: a token is required when uploading new packages to PyPI. To generate a new token, log in PyPI, go to account settings, scroll down to API tokens, add API token. Put this token in
~/.pypircfile to give the local machine permission to upload. - Documentation: Refer to my separate note.
Git (GitHub)
- To reset
.git: sometimes you want to ignore certain files, which are already tracked in the repository. At times like this, you need to reset the.git, which contains the tracking information. First, untrack everything by typing (this removes any changed files from the index(staging area))git rm -r --cached .then run
git add .This adds everything back, but according to the updated
.gitignore. Commit this change and it’s done. -
Command line authentication: starting from summer 2021, GitHub no longer allow username and password authentication from command line interface. Token authentication becomes required for git operations (original blog). With this requirement implemented, when I try to clone my repositories using
git cloneon a new, unauthenticated computer, access is denied.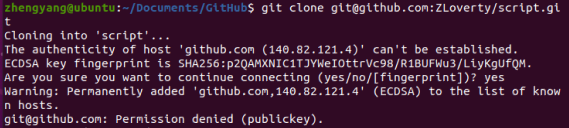
It’s possible to get around this problem with a GUI. In my memory, it was just a set of well-guided steps, involving some clicks in a web browser, and that’s it. However, when a GUI is not available, setting up the authentication is not so straightforward.
One way to do it when only command line interface is available, is to generate a pair of SSH keys using
ssh-keygen. This will generate a pair of key files with encrypted strings.
Paste the content of the pub-key (id_rsa.pub) to the “SSH and GPG keys” tab in GitHub account settings page.
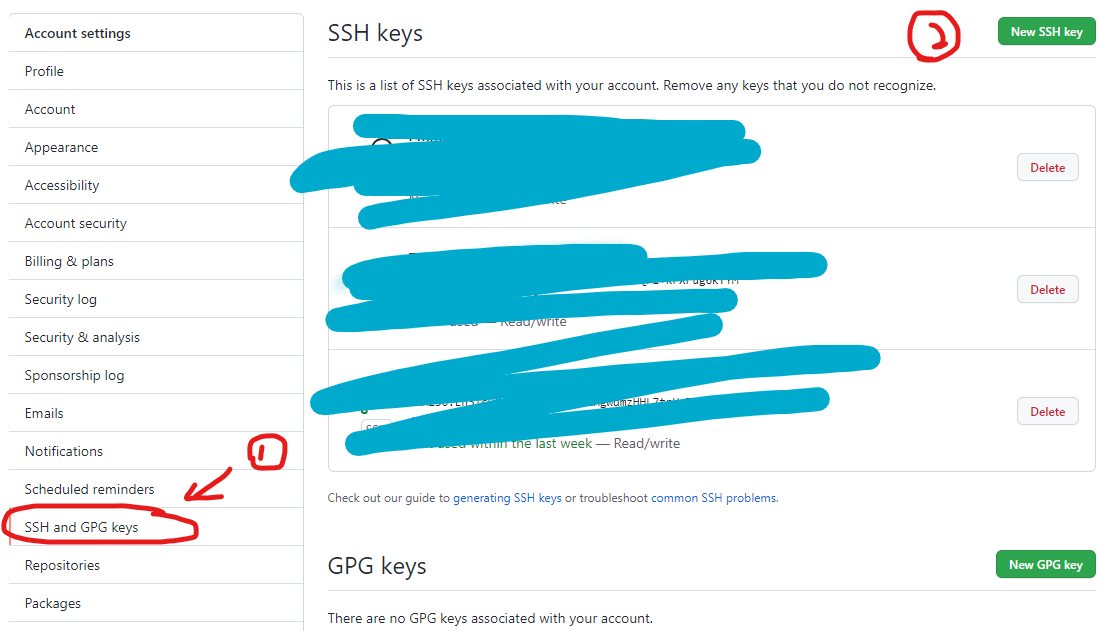
Click on “New SSH key” and paste the pub key in the blank. Now, try to clone the repo again with
git clone
 ssh@url.copied.from.github
.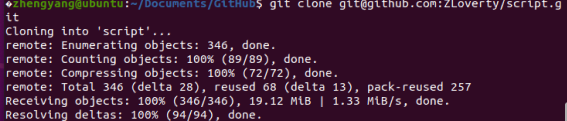
SSH
-
sshworks when the device you are connecting to is in the same private network. -
VPN tools, such as OpenVPN, can create a virtual private network, allowing connection from outside a private network.
-
By default, closing a ssh session kills any user programs. To keep programs running after closing a session, we can install a software
screenon the Linux system. -
Virtual machines can be used to test server behavior.
ffmpeg
- Quick start
ffmpeg -y -framerate 50 -i %05d.jpg -vcodec h264 output.avi-ymeans automatically replace existing file without asking.-ispecifies input images. Note that input images can be an image sequence with C style formatted strings as names.-vcodecprovides a lot of options of different encoders, among whichh264is usually a safe choice. Not many encoders does black and white encodings. The last argument is always the output file name. -
ffmpegimage sequence formatted input only supports consecutive names, e.g. image0, image1, image2, … Inconsecutive names such as image0, image2, image4 cannot be converted by default settings. On Linux build, there is an optional setting called “Globbing” that can be switched on by passing-pattern_type glob. However, such option is not included on Windowsffmpeg. Source - To convert an image sequence (where the numbering does not start from 0-4) to a video, use the option
-start_numberbefore input-i. For example:ffmpeg -framerate 25 -start_number 1001 -i %04d.jpg out.avi - To trim a video, use (time is hh:mm:ss)
ffmpeg -i input.mp4 -ss 00:05:20 -t 00:10:00 -c:v copy -c:a copy out.avi
Cloud Storage
- Globus file transfer supports command line interface (CLI). Batch transfer with custom filtering can be achieved.